How to Print Your Own Giclée Prints (Highly Requested)
*Updated 11/1/21
I’ve been printing Giclée prints out of my home for over a year now, and I’ve gotten so many questions about my process. I was hesitant to write about it too soon, because I was still figuring things out. Making the transition to printing my own Giclées was not easy. For a while, I wasn’t comfortable giving anyone advice. This year, I’ve gotten the hang of things.
I’m finally going to cover everything in this inside scoop article. First, let’s start with the basics.
WHAT IS A GICLÉE PRINT?
Giclée (pronounced: jee-clay) is the best printing technique around. I challenge anyone to name another printing technique that produces better results.
It’s the highest quality you can get when it comes to art prints. Any prints you see in a museum or art gallery are probably Giclée. Aside from the fancy French name that everyone is embarrassed to say correctly (including myself), most people have no idea what this term means. They just know it means quality.
Once you hold a Giclée print and see it up close, you’ll never go back to regular old prints. The colors on a Giclée are rich and vibrant. The lines are crisp. It looks like an original work of art. While Giclée prints are much more costly than regular prints, they’re so worth it. They will last for generations to come. Because of that, you can charge much more for them than regular prints.
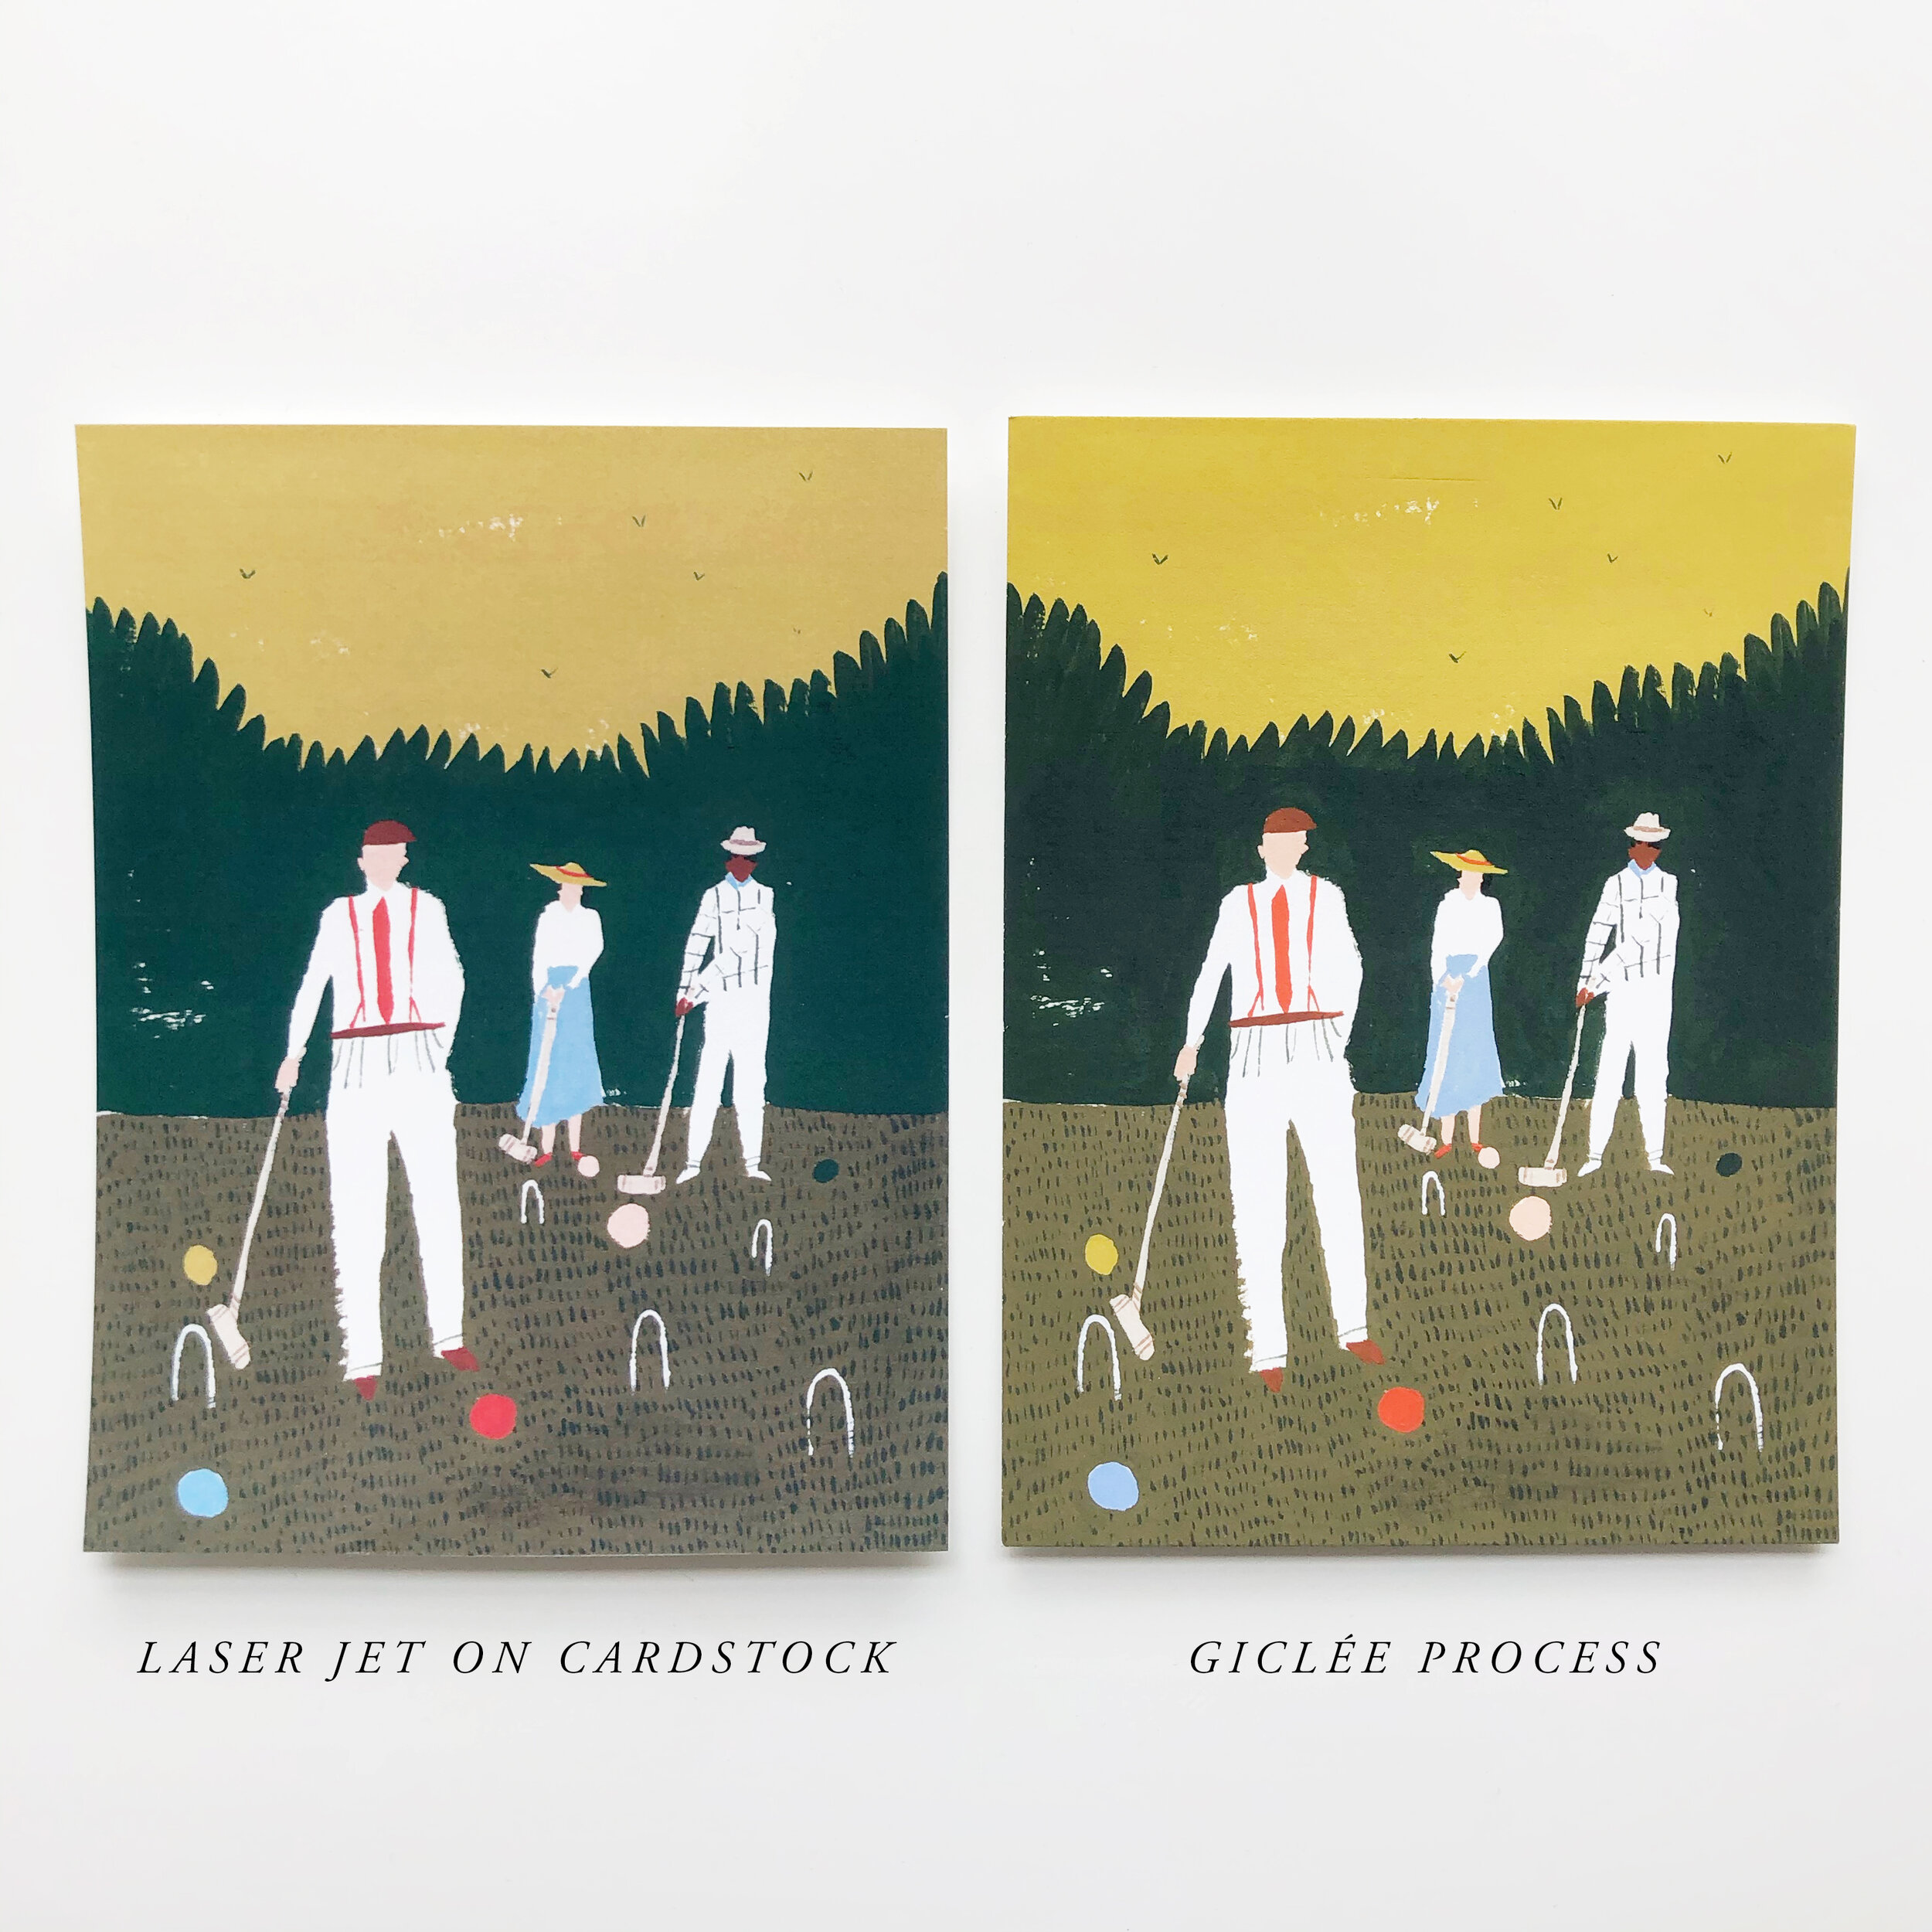
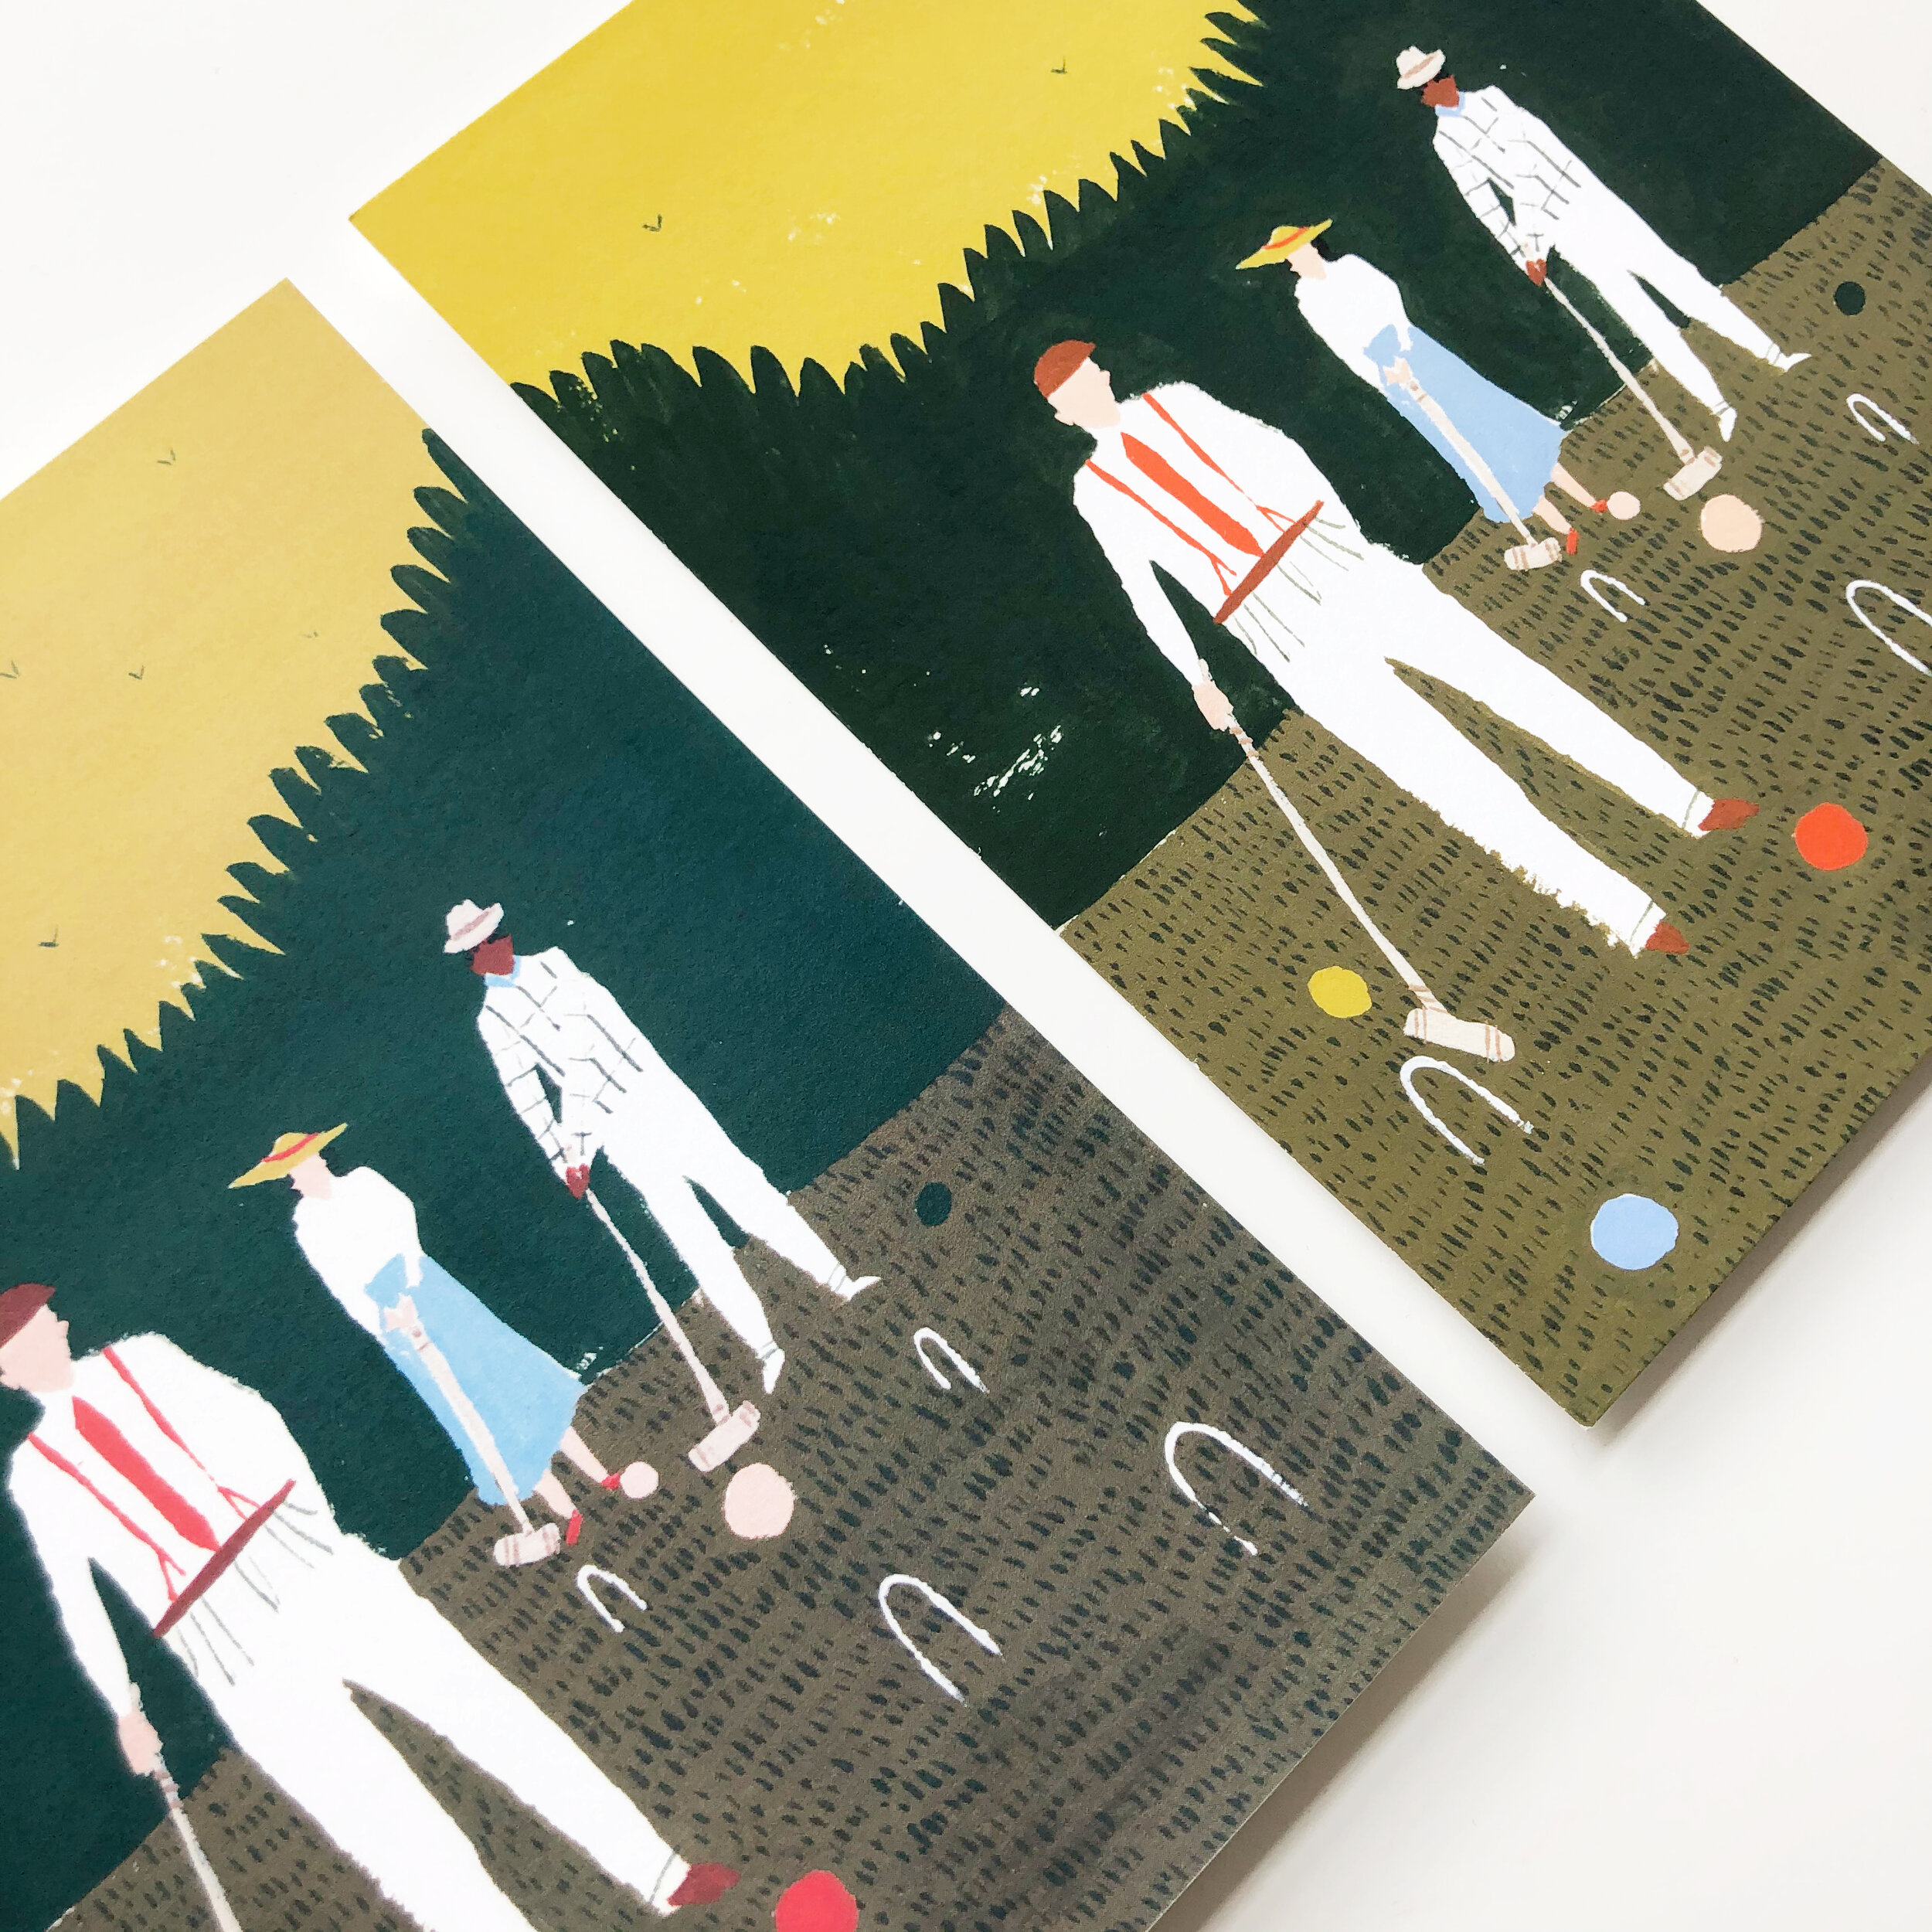
Below, you’ll see an example of a laser jet print next to one of my Giclée prints. There’s no comparison. Unfortunately these pictures don’t even do the technique justice. My Etsy shop has over 300 5-star reviews (most of which mention quality), and this is why.
Now that you understand just how awesome these prints really are, let’s get down to technique. What does the term “Giclée” really mean? It’s actually quite simple, despite how it sounds.
It boils down to three things:
High Quality Art File
Special Printer
Special Paper
1. HIGH QUALITY ART FILE
All art prints should originate from a high quality file, but when it comes to Giclée printing, this is a must. The expensive inks and papers will do nothing if your image is blurry. To create a high quality file, original art should be 300ppi or higher.
Having a high quality art file is the best way to get a crisp image at any size. Think of a photo you open on your desktop. If you zoom in enough, you will see little pixels or squares. The higher the dpi (dots per inch), the tinier the pixels. This means better image quality. This also means bigger files to store, but it’s worth it for the end result. That’s I think a file storage system like Dropbox is a must for artists.
For smaller work, you can use a scanner to digitize your work. If you make larger work, you need to use a camera to photograph your art.
2. SPECIAL PRINTER
This is where the cost of Giclée comes in. You can’t just use a regular printer to produce Giclée prints. You need a printer with more than the traditional four CMYK inks. When looking for a Giclée printer, you’re looking for a 10+ pigment ink printer. The more inks the better. Epson and Canon are the leaders here. If you want to print really large prints, you could easily spend thousands. This is why you have to be selling enough work to make it worth the cost. I always recommend artists outsource their printing until they are selling a minimum of several prints a day.
So why are these printers worth the cost? It’s all about color. The beauty of them is that you don’t have to color correct your artwork much. If you paint something neon pink, and that’s exactly how the scanned in print will come out of the printer! It captures vibrant colors perfectly. When the prints come out, the colors are so accurate, they look like the original painting. Dark shades are so rich, you won’t believe your eyes. Really, the result is stunning.
Another downside to these printers (which adds to the cost) is ink usage. Because there are more ink colors, it’s a full-time job keeping all the ink tanks full. The less white space your artwork has, the more ink the printer will use. I always have extra inks on hand, and I have to change them out every few weeks. A second negative is the learning curve. These printers take a lot of patience to figure out. You will figure it out eventually, I promise. You just need to be patient, and try not to stress about using up ink when things go wrong. You definitely will have some misprints, and color mishaps. A final downside is that these printers are bulky as heck. They usually weigh upwards of 100 lbs. Not ideal for someone who lives in a small space! If you get a really large one, taking it upstairs isn’t even an option.
3. SPECIAL PAPER
This is the final element of a Giclée print, and it also adds to the cost. You’ll want to use a thick acid-free, archival 100% cotton rag paper. For this type of paper, you’re looking at a cost of over a dollar per sheet. Large sheets can be up to $5 per sheet. This type of paper ensures that the inks stick properly and produce a vibrant color quality. The acid-free and archival properties of the paper will keep it from yellowing and showing signs of age over time. By using these papers, again, your prints look like the original paintings.
It’s really just a matter of preference as to which paper you use. Some people like more textured paper, and some like more smooth. Some people like ivory, and some like bright white.
Epson and Hahnemuhle are great paper brands.
COSTS PER PRINT
This may sound great thus far, but how can you calculate costs before diving in head first? As I mentioned above, costs will vary for everyone based on how much white space your art has. For me, the cost of ink is around $1.50-$5.00 per print. Then, you need to factor in packaging costs. It gets tricky when you try to add in what your time is worth to make each piece too. All I can say is that you need to make sure you’re charging enough. I would aim for a 60%+ profit margin.
For Giclée prints, you can charge more, so it shouldn’t be difficult to exceed this. Just make sure you are recording your ink usage and supplies costs so you can adjust your pricing accordingly.


Thanks for stopping by! I’m an illustrator & writer. I’ve been running my own creative business since 2015. My mission is to help artists find their unique creative voice, build positive habits, and do what they love for a living.